≑ Menu

In this post, I want to reference some of my findings related to how the @section, @yield, @stop and @show commands work in Laravel’s Blade template engine as the official documentation regarding these subjects are pretty much non-existent. The @section command is used to define an area within your template, consider the following example: This is our master layout template named master.blade.php, it will reside in the app/views directory.

 <html> <title> @section('title') SiteName @show </title> <body> @yield('content') </body> </html> 

Now what the @section is doing above is creating a placeholder area named title with a default value (SiteName). At end, we use @show, why? To tell it to display the content at that point. If we used @stop, it would not output the title, now take a look at the child template below for a View called home.blade.php (again, this resides in app/views directory of your Laravel installation):

 @extends('master') @section('title') Home | @parent @stop @section('content') A test sentence. @stop 

The only thing its doing is defining content for this particular page / view. But the first thing it does is it tell it to extend the master template, so this child template extends our master template. It calls our section again and modifies it by appending Home | to the original title defined in our master template, so when its parsed as html it becomes Home | SiteName, neat huh? We used the @parent command to retrieve the original title defined by the parent / master template file. At the end we also use @stop command to tell it not to output anything right now, since it will be taken care of by the master template we created earlier. Because the Blade Template Engine does inheriting. One last thing I want to mention is that in the master template file above I used the following: @yield('content') This basically does the same thing as @section(‘content’) and is used if we simply don’t want the inherit (cascading) functionality. @yield is used when you simply want to overwrite the content instead of appending more content to the original.

I hope those who come across this post, find it helpful.. I made this post in quite a hurry for reference purpose as I was just beginning to get into the Laravel Web Framework. If some thing feels confusing or unclear or if something could be improved then please do mention by commenting. Cheers!

{ 0 comments }

SHARY – Free CS Cart Social Media Sharing Addon

SHARY - Social Media Sharing Addon for CS CART I have recently gotten my hands dirty with CS Cart, which is a eCommerce shopping cart system similar to Magento and OpenCart. CS Cart is far less popular than the other shopping cart systems so finding decent, working and free addon for cs-cart is very less likely. I can tell you that CS Cart is fairly complex to get started, and it took me a while to get a decent grasp of how things work in their system; and I am still not up to full marks yet! but I’m getting there πŸ™‚ I created my first add-on for cs-cart so wanted to share this simple, yet useful add-on for people who are running the latest CS Cart version. Which at the time of writing this post is version 4.3.

The purpose of this add-on is to allow users the ability to share their favorite products on social media services such as Facebook, Google+, Twitter, Email, etc, etc.. The add-on comes with a very simple setting panel in the admin area where you can choose to select the social media services which you prefer. All the configuration is pretty simple and straight-forward so i don’t think a deep description of each option is necessary; But still if you find something confusing or broken then let me know. [continue reading…]

{ 8 comments }

500 internal server error caused by editing htaccess file500 internal server error caused by editing htaccess file Just wanted to write a quick post about why you might get a "500 Internal Server Error" message after editing your .htaccess file. This happened to me a few days ago, but i just ignored this message and used some work-around (can’t remember what exactly i did during that time). But i wanted to find the real issue behind this error as it was getting annoying having to encounter it more often.. I was able to pin-point the cause of the problem in matter of a few seconds. But the weird thing is that i first tried doing a quick search for “500 Internal Server Error caused by editing .htaccess file” on Google; which was a very specific search, but i couldn’t find anything specifically related to my issue. I am sure i would have eventually ended up with a good result, but time was a factor here πŸ™‚ So that is the reason behind this post, I’m writing this for future reference and in case anyone else who might stumble upon this issue. OK, I know; Enough talk. The issue was the character encoding of the file. I was using the Komodo IDE instead of of my usual Notepad+, I noticed my Komodo was setup to save all files in the UTF-8 character encoding; so i decided to change the file encoding to Western European CP1252, then saved the file again and BOOM! It worked πŸ™‚ Please let me know if this helped you πŸ™‚

{ 4 comments }

How to Use Post Thumbnails Feature in WordPress

How to Use Post Thumbnails Feature in Wordpress

Displaying Post Thumbnails in your wordpress theme has become a common habit for many theme developers, until now people used to use many different hacks and approaches to include the Post Thumbnails functionality. The built-in Post Thumbnails functionality for WordPress was unavailable to users until version 2.9 came out which bought alot of great changes along with many improvements. We will be going through the process of learning how to use the WordPress Post Thumbnails in our own themes. [continue reading…]

{ 13 comments }

WordPress Post Thumbnail and Image Functions

Wordpress Post Thumbnail and Image Functions

Working with set_post_thumbnail_size and add_image_size

Today, I would like to post about these two handy functions introduced in WordPress v2.9, these two functions are used to integrate and work with the wordpress post thumbnails features, which was also introduced in wordpress v2.9.

I have been seeing people say that these functions are not working in their theme as they should. But i would like to point out some things that might help you with that and at the same time help you understand what the difference in these two functions are.
[continue reading…]

{ 3 comments }

Adding Numbers to Your WordPress Comments

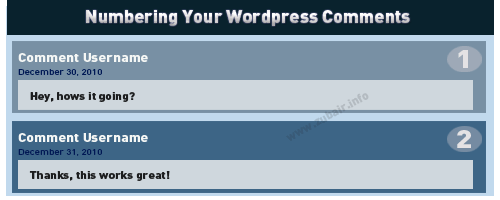
Add Numbers to Your WordPress Comments I was just working on making custom theme, and thought of displaying numbers on version 2.7 – but since then a lot of things have changed, I noticed the need to change things around a little to achieve the wordpress comment numbering. So this is only for WordPress version 2.7 and higher. Though, you can achieve the same with older wordpress version by just modifying the position where you place the code. Just to be clear, I have a custom comment callback function like this one:
wp_list_comments( array( 'type' => 'comment', 'callback' => 'mycustom_comments' ) );

Do note that I only am using type=comment above to show, so this is only numbers the actual comments count and not pingbacks or trackbacks. Before wordpress version 3, i had to fiddle inside the foreach loop like the one below:

<?php foreach ($comments as $comment) : ?>

But not anymore, I just have to go into my custom comment callback function named mycustom_comments and do the changes there, I do not have any loops in there.

But i assume wordpress has that function inside the loop so we don’t really have to worry about anything. Lets start, first go into your comments.php file and find the call to wp_list_comments function and add this above it.

 <?php $counter = 0; ?>

Next, we go into our custom callback function, which should be located somewhere inside the

 function mycustom_comments( $comment, $args, $depth ) { //this is the function declaration global $counter; // Make counter variable global so we can use it inside this function. $counter++; 

Finally, add the below code where ever you want the numbers to show.

 <?php echo $counter; ?> 

Sorry, i am writing this post in quite a hurry so if you see something missing, confusing or need to ask something then feel free to comment and let me know.

{ 10 comments }

CSS font-style: oblique vs italic

css font-style: oblique vs italic

What’s the difference between CSS’s oblique vs italic?

Oblique type (or slanted, sloped) is a form of type that slants slightly to the right, used in the same manner as italic type. Unlike italic type, however, it does not use different glyph shapes; it uses the same glyphs as roman type, except distorted. (Wikipedia)

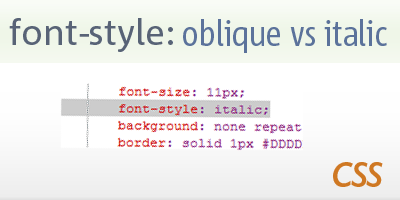
I was very curious to find out what’s the real difference between an Oblique style and a Italic style used in font-style CSS property. I’ll be sharing what i found about the differences. Visually, the difference can be sometime hard to notice. The Oblique Style uses the same font as Normal (non-italic version of the font-type / font-face) but skews (slants) it to the right a-little before presenting it to the screen – it looks less readable than the true Italic version. While the Italic Style uses a Italic type/version of the font, most of the time almost all fonts have a Italic version of the font which has special characters defined for it. But that is not Always the case, some times the Font Designer doesn’t provide those and only provides the Normal version of the font. css font-style oblique vs italic example So if you are using Italic on a font-type (font-face) that doesn’t have its own true Italic version of the font, it will automatically use the Oblique version which just uses the regular version of the font but skews / slants it a-little to the right so it appear as if it were the Italic version but i think it would be called more like a fake Italic. Please comment and let me know if i missed something or if you found this post helpful – OR if there is anything i can do to improve the post πŸ™‚

{ 11 comments }

Recently, I started upgrading all my applications to the latest versions or at least upto the version my hosting providers uses – i was using Apache 1.3.x HTTP Server, but I’ve finally upgraded to the latest version which is Apache 2.2.15 & PHP 5.3.2 as of writing this post. I think it’s a good idea to keep your Apache / PHP and MySQL up-to date with the latest release or at least up-to date to match your Web Hosting Provider. Anyways, while i was upgrading from Apache 1.3.4 to Apache 2.2.15 i ran into a problem – Apache 2 actually installed pretty smoothly without any complicated issues arising. After the Apache & PHP Installation I started to setup Apache to use PHP where the real problem begin, Apache couldn’t load the php5apache2.dll Module, it was saying that the module can’t be found (look at the below pic to see the error i was getting). Apache 2.2.x Can't Load php5apache2.dll Module Error I was using the PHP Installation Manual (install.txt) all this time that came included with the PHP zip file, i had the below values added as said in that install file: # For PHP 5 do something like this: LoadModule php5_module "c:/php/php5apache2.dll" AddType application/x-httpd-php .php # configure the path to php.ini PHPIniDir "C:/php" I then double checked the PHP installation directory to make sure there is a file called php5apache2.dll and sure enough, it was there. While i was checking for the above file I also noticed that there is another file in that directory called php5apache2_2.dll. I tried giving that file a try and change the file name in httpd.conf from php5apache2.dll to php5apache2_2.dll, Which got it working! It was a really simple fix but very easy to overlook it. Hope this will save others (who come across this issue) some valuable time.

{ 7 comments }

Wateen Connector is one of my projects that got me interested in Visual Studio .NET – some of the team members at CyberPK helped and contributed to this small utility.

I actually made this on a request from a CyberPK’s Loyal and Regular user, I didn’t thought that other users would be experiencing the same problem like him, Until i recently fell into it myself. It sure is annoying, having to keep logging in to your Wateen WiMAX account – so Wateen Connector was created. Wateen Connector is Exclusively made for Wateen WiMAX users.

About Pakistan’s Wateen Telecom

Wateen Telecom is a Internet Service Provider in Pakistan, its a new venture of Warid Telcom – Wateen Telecom established one of the largest country-wide WiMAX Network in the world.

Wateen Connector lets you log into your Wateen Services as you usually do. The extra features that you get is that Wateen Connector allows you to Monitor your internet connection and if it goes down it will let you know about it, And will ask if you like to keep monitoring it. If you set monitoring on you will be notified as soon as you disconnect or get connected – Wateen Connector also has a Auto-Login feature that logs you into your Wateen Account easily and effort-lessly!.

Wateen Connector now lets you chat with other Wateen users using the chat services implemented on our website. One of the useful features that we added was the ability to view your bandwidth usage from the application.

For complete detail and information visit Wateen Connector’s Homepage.

{ 5 comments }

Upload Class For PHP

class.upload.php – Free PHP Upload Class

This PHP script uploads files and manipulates images very easily. The perfect script to generate thumbnails or create a photo gallery! It can convert, resize and work on uploaded images in many ways, add labels, watermarks and reflections and other image editing features. You can use it for files uploaded through an HTML form, a Flash uploader, or on local files. It uses the GD library. This script is released under the GPL Version 2.

If your project is not GPL, commercial licenses are available.

Look at the example below:

 $foo = new Upload($_FILES['form_field']); if ($foo->uploaded) { // save uploaded image with no changes $foo->Process('/home/user/files/'); if ($foo->processed) { echo 'original image copied'; } else { echo 'error : ' . $foo->error; } // save uploaded image with a new name $foo->file_new_name_body = 'foo'; $foo->Process('/home/user/files/'); if ($foo->processed) { echo 'image renamed "foo" copied'; } else { echo 'error : ' . $foo->error; } // save uploaded image with a new name, // resized to 100px wide $foo->file_new_name_body = 'image_resized'; $foo->image_resize = true; $foo->image_convert = gif; $foo->image_x = 100; $foo->image_ratio_y = true; $foo->Process('/home/user/files/'); if ($foo->processed) { echo 'image renamed, resized x=100 and converted to GIF'; $foo->Clean(); } else { echo 'error : ' . $foo->error; } } 

[continue reading…]

{ 8 comments }